
Your hardcore PvP experience doesn’t need to wait for divine providence. You can fix the errors by yourself with a bit of guidance. So, how to fix “Server Connection Lost” on Escape From Tarkov?
The “Server Connection Lost” error appears to be a server issue. It happens on the platforms where the game is available (Windows 10 and 11). Therefore, it could also be a Windows error.
However, various possible culprits and variables can cause the problem. We will analyze the potential causes and solutions to get your game back in shape.
“Server Connection Lost” Escape From Tarkov Error Causes
Let’s start the troubleshooting by identifying the possible causes. It may help you fix the error quickly.
- You’re not picking the proper server on the game.
- There’s a random error in your computer, the router, or the network.
- Your Windows operating system is out of date.
- Your connection is slow or unreliable. Therefore, you’re not getting enough bandwidth to enter a lobby.
- Your DNS is corrupted, slow, or incompatible with Escape From Tarkov.
- The game’s content is not available in your country or region.
- Your IPv4 or IPv6 settings are slow or not compatible with the game.
Either way, Escape from Tarkov will get stuck on the main screen whenever the error happens. Then, you’ll see the error when the game tries to log in to a lobby.
How to Fix “Server Connection Lost” on Escape From Tarkov?
Let’s revise the solutions we offer, which range from picking a server to using a static IP. We’ll tell you when it’s time to test the game again and when to keep going.
Restart PC and Router
The first and obvious solution is restarting the PC and the router. Here’re the specific steps:
- Restart the PC as usual.

- Go to your router and turn it off.
- Unplug all of its cables for 10 seconds to 1 minute.
- Afterward, plug back all of its cables, and turn the router back on.
- Go back to your PC and test the game.
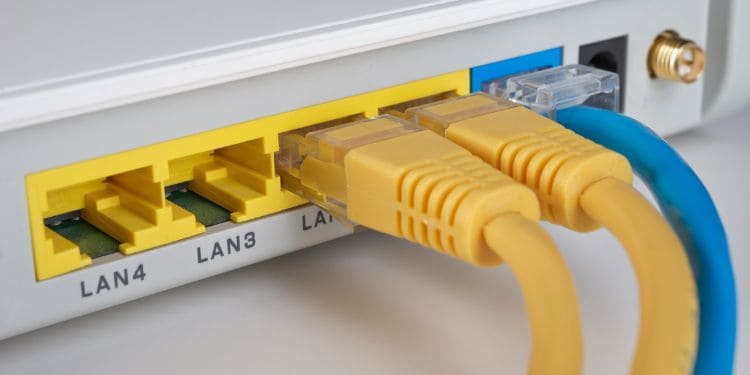
This simple method can delete bugs from the network, but before you try anything, move on to the next solution.
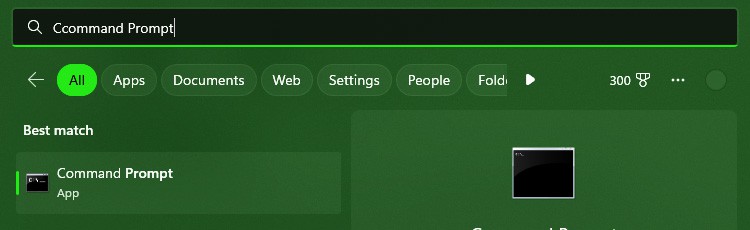
Flush the DNS
To further erase network errors, we’re trying a DNS flush. We can do this through the Command Prompt, and the process resets the DNS address to refresh the network.
Here’re the steps:
- Click the Windows Key on your keyboard.
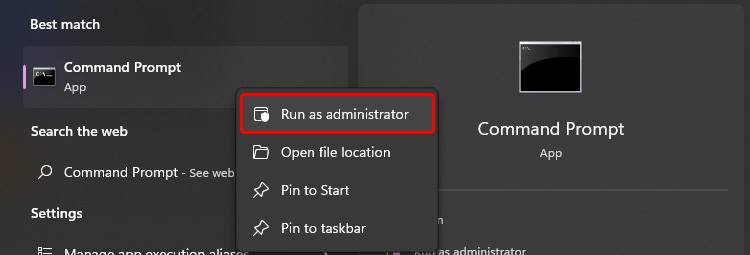
- Type Command Prompt

- Right-click Command Prompt and select Run as administrator.

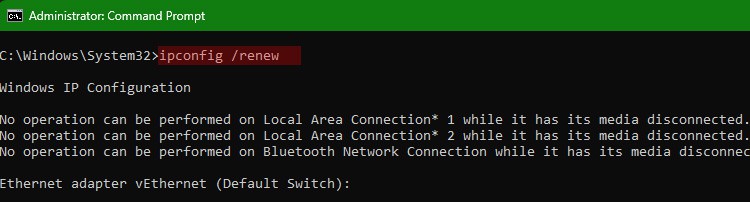
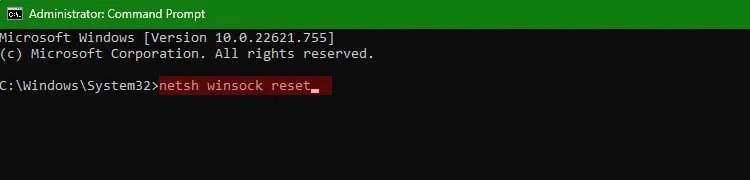
- After you open the console, copy-paste the following command. Make sure to hit Enter after copy-pasting each command.
ipconfig /releaseipconfig /flushdns
ipconfig /renewnetsh winsock reset
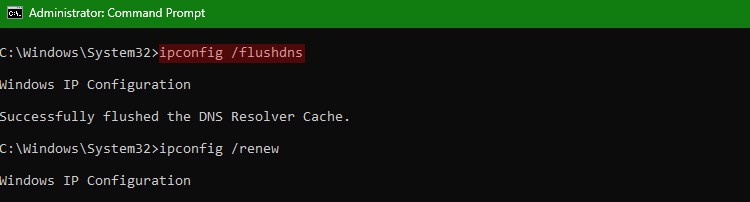
After running all these commands, restart the PC and test the game again. If it doesn’t work, keep going.
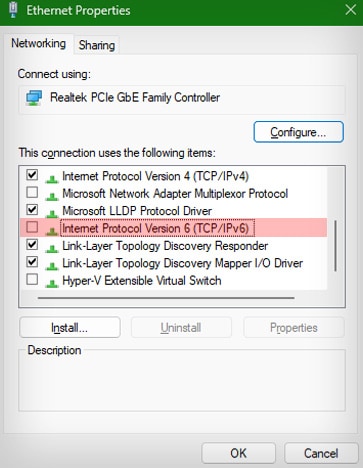
Disable the IPv6 service
Another standard solution for the server error is turning off the IPv6 server from your computer. Most people don’t use the IPv6 connection protocol, so you won’t experience any side effects.
Here’re the steps:
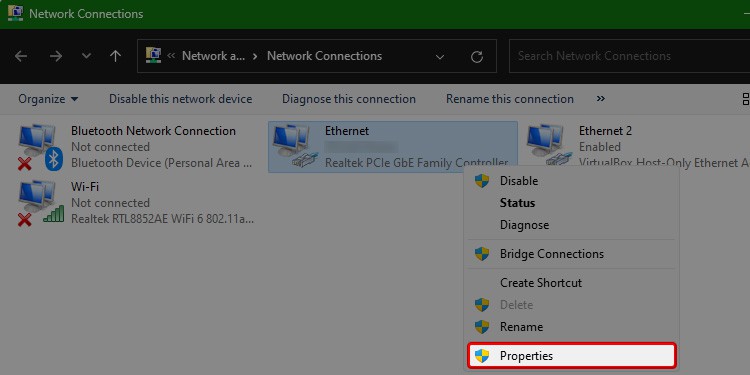
- Press Windows Key + R to open Run.
- Type
ncpa.cplon the Run box and click Ok. It will take you to the Network Connections Menu. - Right-Click your network (Ethernet or Wi-Fi) and select Properties.
- Uncheck Internet Protocol Version 6 (TCP/IPv6.

- Click Ok to confirm.
Now it’s an excellent time to test the game. Again, if it doesn’t work, try the next solution.
Update Your Windows System
Perhaps your computer needs to update its network drivers, and you can do so by updating the entire operating system.
Windows updates automatically, but if your internet connection is slow or unstable, you may want to check manually often. Here’s how to do it:
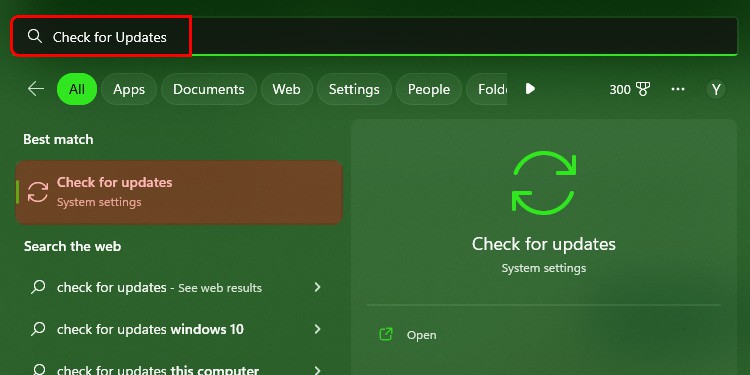
- Click on the Windows icon on the taskbar.

- Type check for updates and tap on Check for updates
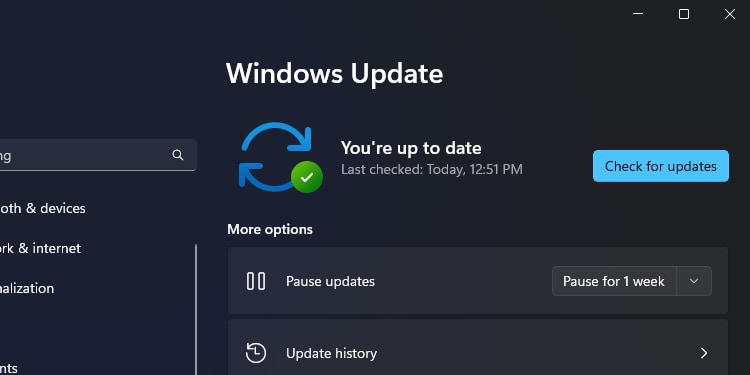
- Click on Check for updates.
- If an update is available, click on “Download & install.”
- Either way, let the system download and install the updates. Your computer will let you know when it’s time to install and ask you to restart the PC.
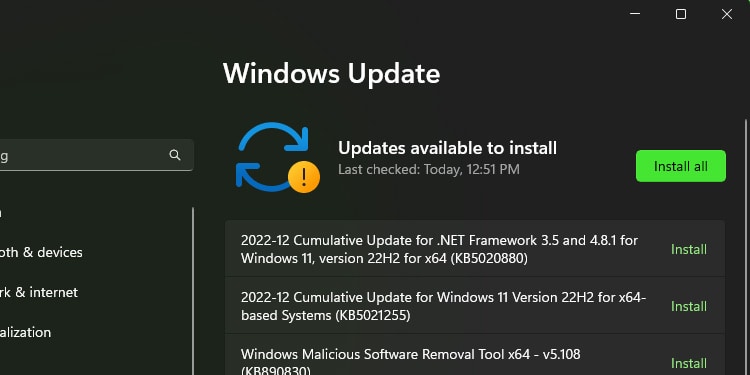
After updating the PC, test the game again. If no update is available, continue with the next solution.
Add a Static IP
Dynamic IPs are the default option you get from your router. These are changing numbers the router awards to the devices on the network each time they connect.
A Static IP is a fixed number you set, so it doesn’t change. That makes it more reliable and especially friendly to multiplayer games.
Static and Dynamic IPs share most numbers, and the only thing that varies is the last digits. In essence, dynamic IPs change the last digits to avoid repetitions, but a Static IP selects a high enough last digit so that it never comes in conflict.
I’m showing you how to add a Static IP to your PC in a way you can follow on Windows 10 and 11 computers. There’re other ways, but the method below is fairly straightforward,
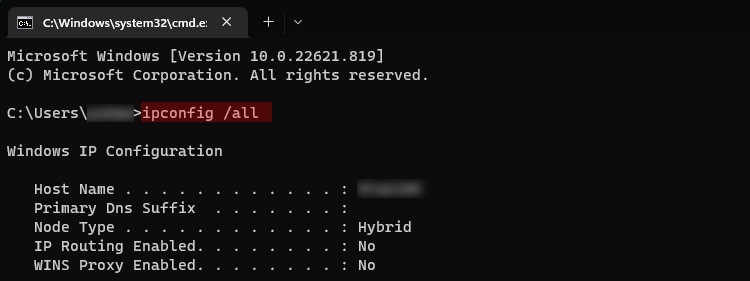
Even so, we have to start by finding your IP address:
- Click the Windows Key on your keyboard.
- Type Command Prompt and open the console.
- Copy-paste the following command following command and hit Enter
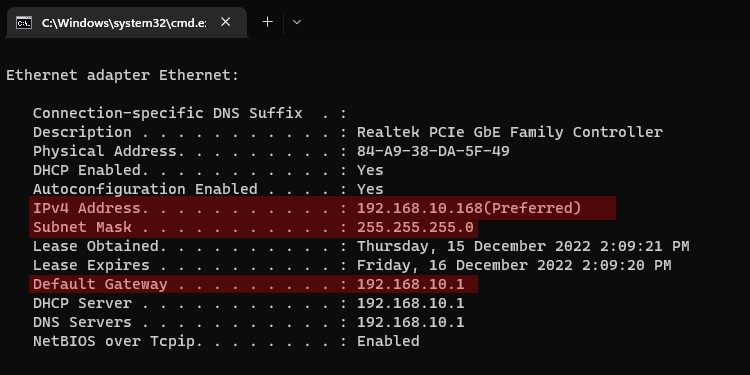
ipconfig /all
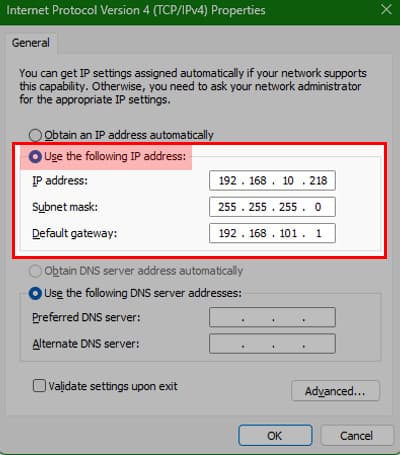
- Scroll down for your network settings (wireless or LAN), write down the following data: Default Gateway, Subnet Mask, and IPv4.
After writing down the data, continue with these steps:
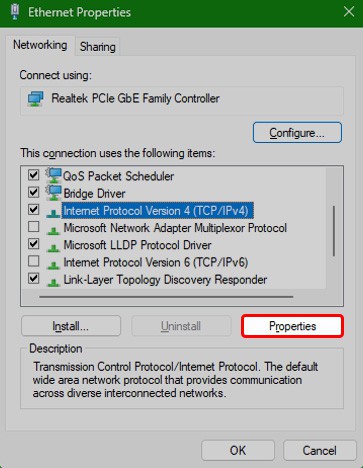
- Click the Windows Key on your keyboard.
- Type View network connections and select View network connections on left pane.
- Right-click your network and select Properties.
- Select “Internet Protocol Version 4 (TCP/IPv4) and click on properties.
- Click the radio button saying Use the following IP address
- For now, type the same IP address, Subnet Mask and Default Gateway you have noted before.

- You’re going to change the last digit of IP Address.
For example, my IP here is192.168.10.168. I have added 50 to my original IP address to make it192.168.10.218. - Test the game again.

Use the Automatic Option to Pick a Server
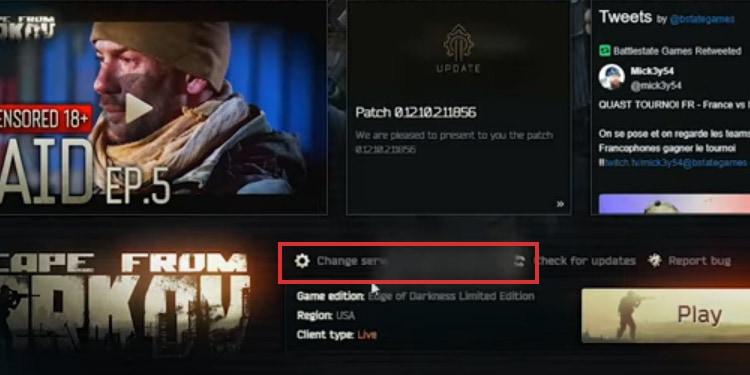
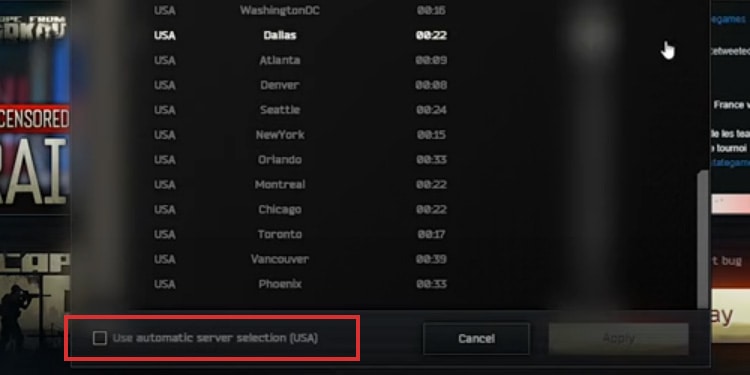
Perhaps you’re experiencing the error because you’re not correctly selecting a server. Here’re the steps to do it:
- Open the game
- Click on “Change Servers” at the bottom
- Select the server closest to your region. It should have the lowest ping possible. Otherwise, check the automatic option.
- Once you select a server, select Apply.
Test VPN Connection

The last solution is trying to use a VPN service. These will allow you to connect to a server from another country, which may make the game available.
You can find a free VPN like Proton VPN Free or a paid service like Surfshark. You must subscribe to the service, install it on your computer, set it up, and test the game again.
Each VPN will have its own mechanics, but these programs (as well as the web pages) can guide you easily.


