
Roblox has given creators plenty of platforms to showcase their talents. From creating their own games to making unique costumes for every character, creators are free to use the sandbox environment of Roblox to their full advantage.
Creating clothes in Roblox is a fairly simple task, and you can create unique clothes for your character as well as put them on sale. Apart from the uploading cost, the whole process is free, which is very beneficial for the creators. In this article, we have discussed how you can make a Shirt in Roblox and also upload them.
How to Make a Shirt in Roblox
Creating a shirt in Roblox is as easy as putting on the lid of a cup. You just have to put your designs inside the template that Roblox provides you. Here is a complete step-by-step process to make a custom shirt in Roblox.
- Open your web browser and log in to your Roblox account.
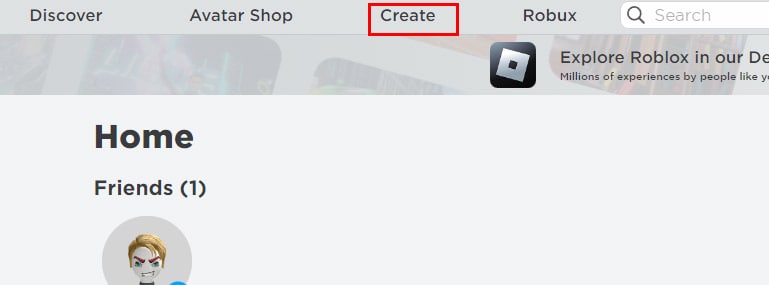
- Once you’re logged in, click on the Create tab from the navigation bar.

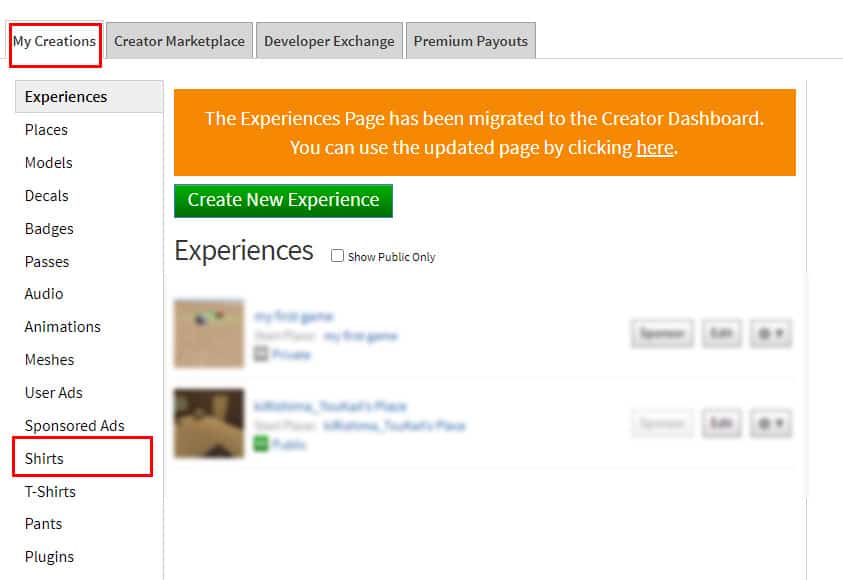
- Now, under the My Creations tab, select the Shirts tab.

- Download a shirt template from there.

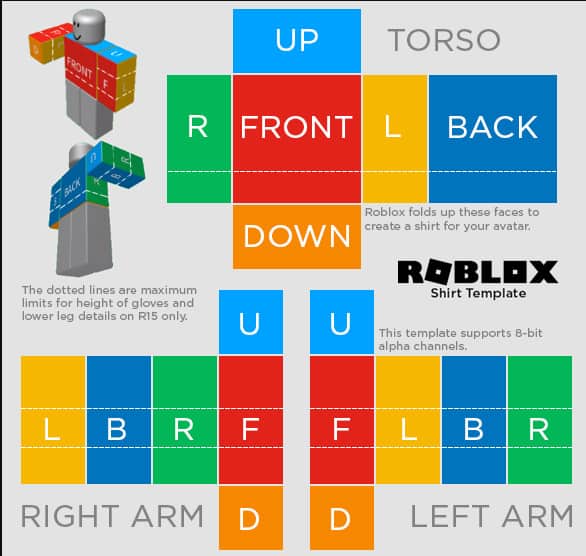
- Now, open the template in any photo-editing software you have.
- Put your designs on top of the squares inside the template.
- Here is the complete information about the size of each square on the template.

| Shape | Size (px) | Parts |
| Large square | 128 x 128 | Front and Back |
| Tall rectangle | 64 x 128 | Sides of torso (right and left), Sides of arms (left, back, right, and front) |
| Wide Rectangle | 128 x 64 | Up and Down |
| Small square | 64 x 64 | Top and Bottom of arms |
Once your shirt is completed, save it in the PNG format.
How to Upload Your Shirts on Roblox
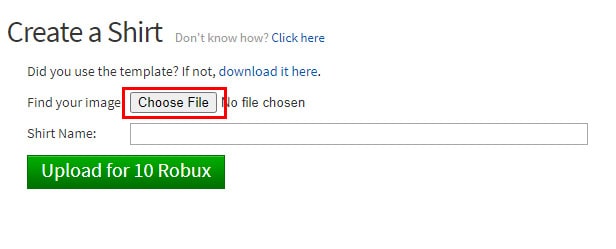
Once you have made your own custom shirt, you can then upload it to the Roblox store for sale. It costs 10 Robux to upload a shirt in Roblox. Here’s how you can upload your clothes in Roblox.
- Open your browser and visit Roblox’s homepage.
- Then, log in to your account.
- Click on the Create tab once you’re logged in.
- Under the My Creations tab, select Shirts.
- Now, click on Choose File and select the shirt that you have created.

- Name your shirt and click on Upload.

How to Test If Your Shirt is Ready For Upload
Before other Roblox players buy your shirt, you might want to make sure that it fits their avatars. You can do so by launching Roblox Studio and testing your clothes on different avatars.
- Launch the Roblox Studio application on your PC. (You may need to download it if you don’t have it installed on your PC.)
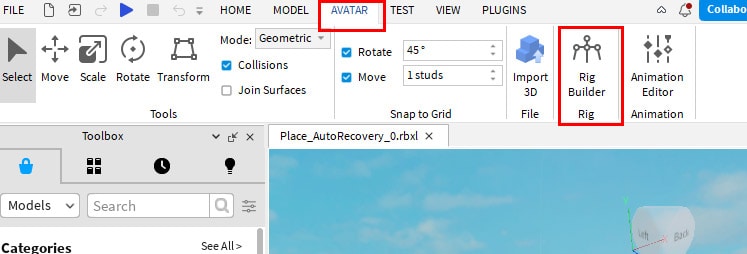
- Click on the Avatar menu, then click on Rig Builder.

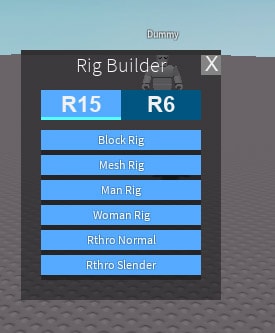
- Now, select your rig.

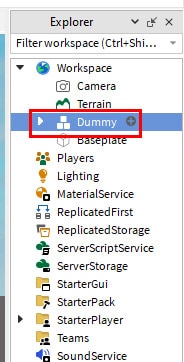
- Hover your cursor over Dummy inside the Explorer window, and click on the ‘+’ icon next to it.

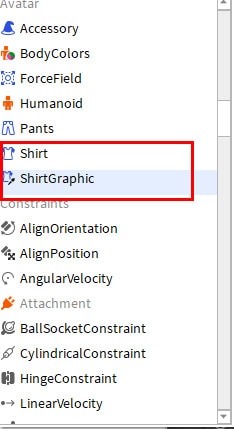
- Scroll down and select the Shirt Graphic or Shirt option.

- Click inside the Properties and select the shirt that you have just uploaded to Roblox.
Note: You can make other clothes like Pants and T-Shirts in similar way.


")