
“Failed to bind port” is a common issue occurring within the realm of servers of Minecraft, especially when you are trying to host a server. It’s usually an IP error where your Minecraft server IP does not match the Computer IP address, thus unrecognizing your computer as a server for Minecraft.
How to Fix Minecraft Failed to Bind Port
In some rare cases, it can be the Internet Service Provider issue and also slow internet speed. We will start with some simple fixes and move on to the complex ones to troubleshoot the issue.
Check Internet Connection Speed
Sometimes slow connection speed can be the cause of a Bind Port error. As you host your Minecraft server, It’s absolutely necessary to have a good internet connection.
You can check your internet connection speed with the help of a website such as Fast.com or speedtest.net. In many cases, restarting your router may solve the slow speed of your internet.
Terminate Java
Java is a compulsory tool to run Minecraft, but sometimes, these files become a barrier between working servers. In such cases, we need to end those java related processes from the task manager.
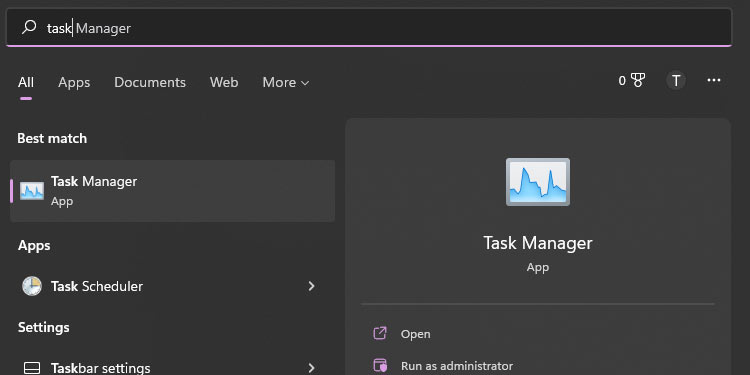
- Click on the start button and type Task Manager
- Click and open Task manager

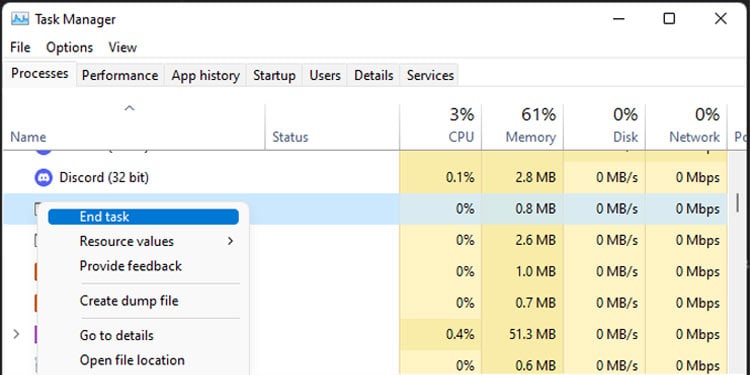
- Search for Java(TM) Platform SE binary within the list of Processes in the Task Manager.
- Right-click and select End task from the list of Options.
Restart your computer and check if you can run your Minecraft server now. If it still shows the same error then move on to the next fix.
Run the Troubleshooter for Internet Connection
Troubleshooting is a reliable option for solving windows-related problems, and it can solve internet-related issues as well.
Here are the steps to troubleshoot any internet connection-related issues:
- Click on the Windows icon and type troubleshoot. The Troubleshoot settings will appear.
- Click on the Troubleshoot settings, and the setting window will appear.
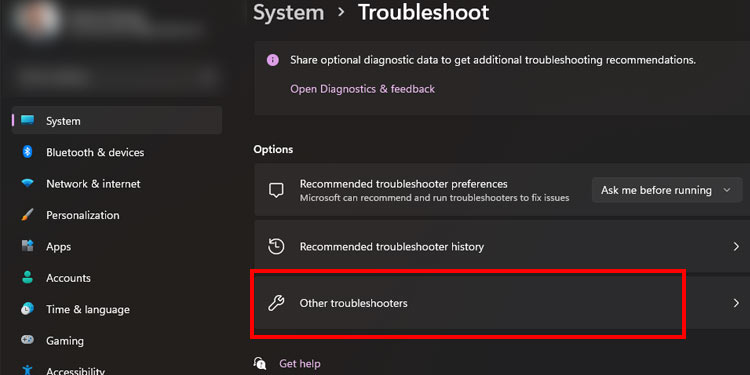
- Click on Other Troubleshooters on the third row under the Options.
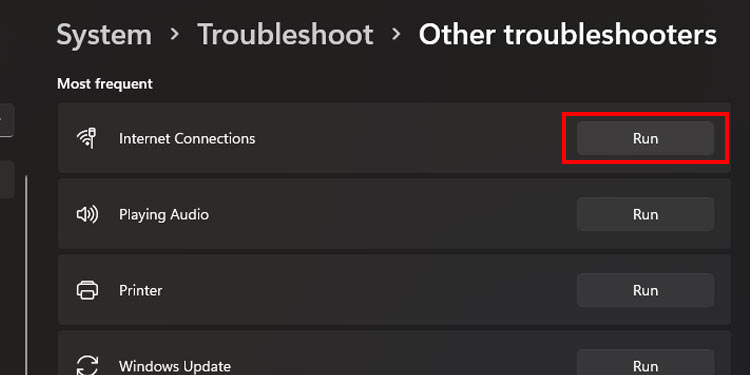
- Click on Run for the Internet Connection Option, and the system will start troubleshooting.

Close the window and try running the Minecraft server to see if the problem is still there.
Change Your Server IP in server.properties.
Here, you need to change your Minecraft server IP to match the IP address of your network. Below are the steps to connect the Minecraft IP server with your computer IP.
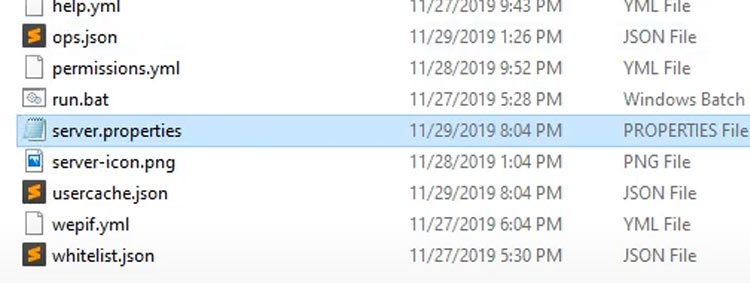
- Locate the Server folder.
- Among the list, find
server.propertiesand open it with notepad by right-clicking, going to Open with the option, and selecting notepad.
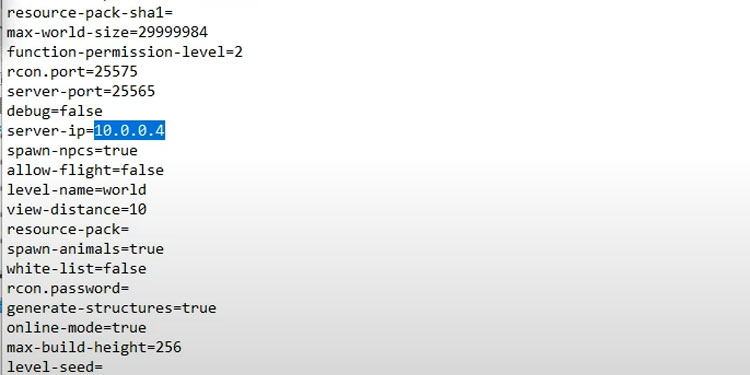
- You can find the Server IP in the list, along with the IP address. We need to match the address of the server IP with your system’s internal IP Address.
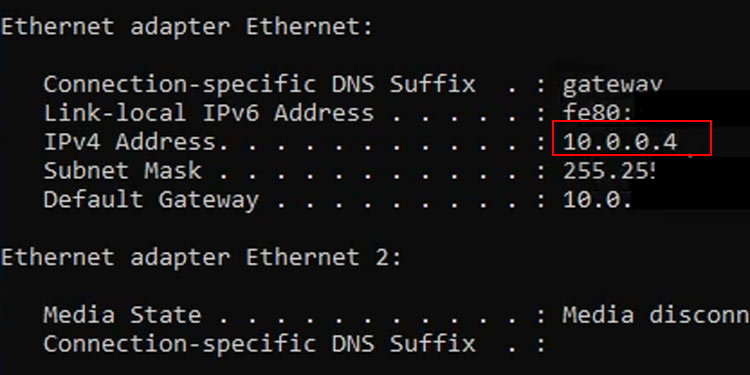
- To find your system’s IP Address, Press window+R, and type
'cmd‘. - Type ‘
ipconfig‘ in the command window and press Enter. The window will reveal the Ethernet adapter connection. - Copy the address of IPv4 and paste it into the notepad file that you opened above.
- Save and close the server.properties notepad and try opening your Minecraft server.
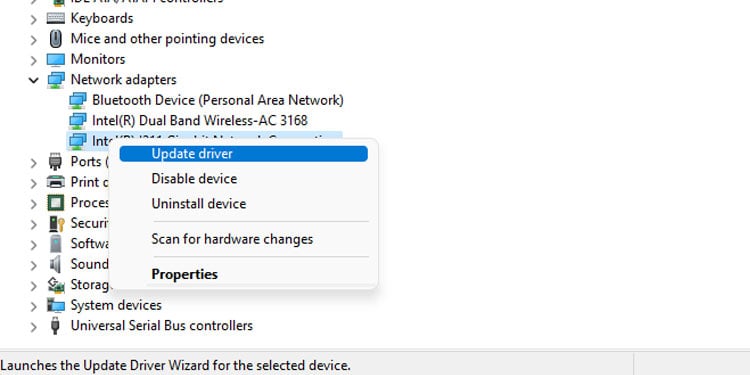
Update Your Network Driver
Simply updating the network driver can sometimes solve the issue. The update is automatically done with internet connection but sometimes you may need to initiate this action manually.
Here’s how you can update the network driver manually:
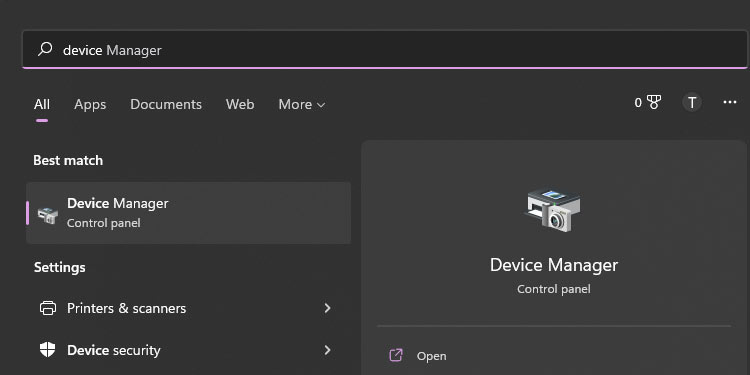
- Click on the start menu and search for device manager.
- Open Device Manager and click on Network adapters to expand the option.
- Right-click on your device driver and select the Update driver.
- Click on Search Automatically for drivers and the system will update your driver to its latest version.
Release and Renew Your Ipconfig
Release and Renew in the command prompt is one way to refresh your IP. It releases your old IP and requests a new IP address suitable for the Minecraft server.
Below are the steps you need to follow to release and renew your ipconfig:
- Open the Command prompt.
- On the Command prompt window, type these commands. Make sure you press enter after entering each command.
ipconfig/releaseipconfig/flushdnsipconfig/renew
If the following process does not work and you are facing the same connection issue, then the fix below is the last option.
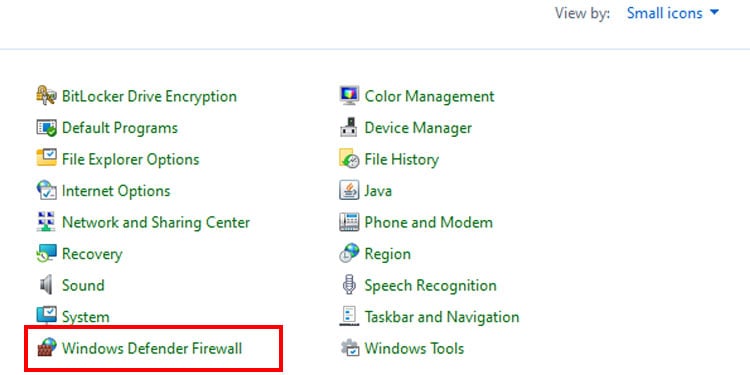
Allow Java Through Firewall
Here, you have to allow every single Java file blocked or disabled by Firewall. It’s a bit of a lengthy process but this might be the reason why you are facing this port error.
- Click on the Start button and search for the control panel to open the Control panel window.
- From the list of small icons, Click on Windows Defender Firewall, which will direct you to the Window Defender Firewall page.
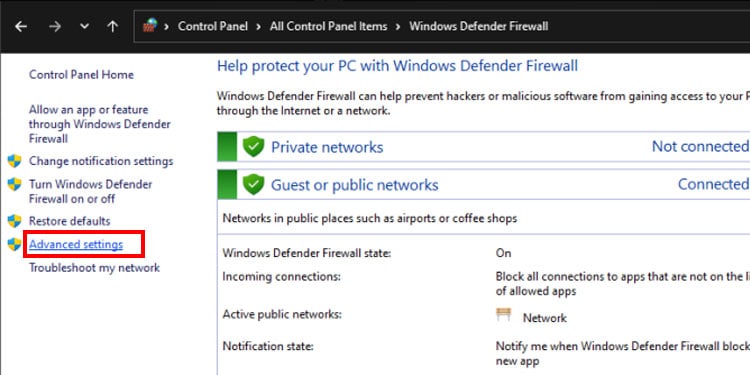
- Click on Advanced Settings on the left, and a new window will pop up.
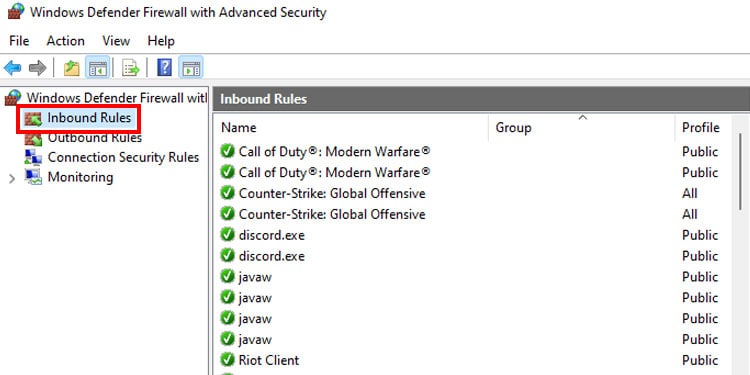
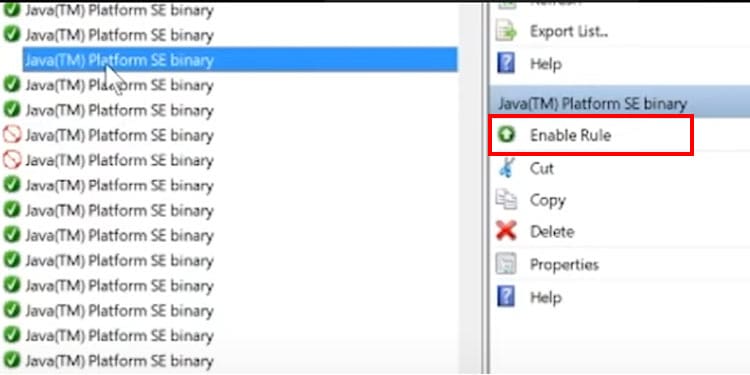
- Click on Inbound rules at the top right corner, and the window will present you with a list of allowed and blocked actions.
- From the list of options, look for every option that has the word “java” in it.
- The green check mark is enabled, whereas the red circle is blocked.
- If they have a blank instead of a green check mark, then you need to enable it by clicking on Enable Rule. Go ahead and enable every java action.
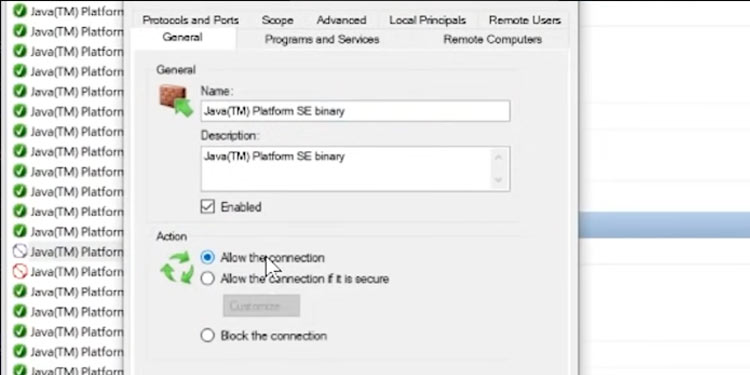
- For blocked Java, you need to select each one and click on properties to allow the Connection.
- Click on properties on the right side of the list. Change your option from Block this Connection to Allow the Connection. Do this to every java property, and you are set to run the Minecraft server.
These are the number of fixes you can try to solve the “Failed to bind to port” message on your server. Now you can host your Minecraft server and enjoy the game with your friends.


")